Reviewed by Louise Chang, MD on January 14, 2011
Source: WebMD
Myth: Small Bladder, Big Problems
Some people blame a small bladder for frequent leaks, but your body's normal "capacity" is rarely the true cause of a life-disrupting problem. In healthy people, that capacity ranges from 1 to 2 cups. The real culprit is more likely to be weak muscles, medication side effects, infection, or nerve damage -- and effective treatments are available.
Fact: Twice a Night Isn't Right
One bathroom trip during the night may be acceptable, but for two or more -- called nocturia -- it's time for a checkup. To determine if it's caused by a treatable condition, your doctor will want more information: a bathroom diary, record of fluid intake, and a list of medications and known illnesses. Some possible causes include drinking a lot just before bed, an enlarged prostate, certain medications, and overactive bladder.
Myth: You Need 8 Glasses a Day
We don’t all need eight glasses of water a day, the one-size-fits-all health mantra that just won't die. If you tend to leak, this could be why. Fluid needs differ, depending on your size and activity. The best advice for healthy people is to drink when you're thirsty and stay hydrated. This keeps urine from becoming too concentrated and reduces the risk of developing kidney stones.
Fact: Anyone Can Have Bladder Trouble
Bladder problems impact men and women at many different stages of life. Though they might be more common in certain groups -- including women who have had children, older adults, men with a history of prostate trouble, and people with spinal cord injuries -- nobody should suffer silently. People with problems should seek advice from a doctor.
Myth: Drinking Less Is Best
Waving off the waiter when he tries to refill your glass may help a little. But doctors say a fully functioning bladder should be able to handle a normal fluid intake. You might want to consider downsizing that morning cup of coffee or skipping the cola because caffeine is a bladder stimulant.
Fact: It's Not Always a Prostate Problem
Plumbing problems in men can sometimes be caused by an overactive bladder, not related to an enlarged prostate. Both conditions can send men running to the bathroom again and again, but the treatments are different. Talk to your doctor about all your symptoms, what testing may be needed, and what treatments may be appropriate.
Fact: Kegels Are for Men, Too
You may have heard of women doing these bladder control moves after childbirth. Doctors recommend them for men, too. While urinating try stopping the flow midstream. Then, start again. The muscles that stop your flow are what you want to work on strengthening. Next, on an empty bladder, try contracting these muscles for 3-5 seconds and then release, and keep the stomach, buttocks, and legs relaxed. Work up to three sets of 10 repetitions each day. You can do Kegels anywhere, anytime, without anyone noticing.
Fact: A System and Schedule May Help
Bladder training is a first step that may help some people with overactive bladders. You resist the first urge to go and wait for the scheduled time. Gradually, you can try holding it longer. Together with Kegels, these two methods can cut overactive bladder episodes by half.
Fact: Shaping Up for Bladder Control
A healthy lifestyle may play a supportive role in preventing and lessening some bladder problems. Doctors say getting regular physical activity and doing Kegel exercises can reduce stress incontinence, the leakage caused by coughing, laughing, or sneezing. And because carrying a lot of extra weight causes bladder troubles -- slimming down may help, too.
Myth: Bladder Problems Are a Fact of Life
If bladder problems are bothering you, talk with your health-care provider. Incontinence is a medical problem -- not an inevitable part of aging. Treatments will depend on a person’s specific problem and overall health, and people who seek help often see improvements in their symptoms and their day-to-day life.
Tuesday, June 21, 2011
Sunday, June 19, 2011
Bandaging Injuries From Head to Toe
Reviewed by Michael W. Smith, MD on April 07, 2010
Source: WebMD
Scratches and Cuts on the Face
Your injury’s location can affect how you bandage it. For most injuries, first you’ll want clean it with water to get rid of debris and help prevent infection. Then, stop bleeding by applying pressure with sterile gauze. Face injuries can bleed a lot. But once bleeding stops, minor face cuts can go uncovered. Or a small adhesive strip can work well. You may need stitches if your cut is deep or longer than 3/4 inches.
Don’t Pop Blisters
Small, unbroken blisters can be left uncovered and will usually heal on their own. The exception -- if a blister is in an area where it might get rubbed, such as on the sole of the foot. In that case, protect the blister with a doughnut-shaped moleskin pad. For broken blisters, apply an antibiotic ointment and loose bandage.
Wrap Sprains and Strains
A sprain means torn ligaments or tendons, while a strain involves an overworked muscle. The signs are pain and swelling. In addition to icing the injury, wrap it with an elastic compression bandage. You want it snug but not so tight that it cuts off circulation. Keep the bandage on for two days to reduce swelling (loosening it at night). See a doctor if the pain becomes severe or doesn’t improve after five days.
How to Treat Minor Burns
Seek medical help for burns if they are severe, on the face, or bigger than 2 inches. For treating small minor burns at home, rinse the area in cool water. Never use butter, grease, or powder on a burn. After rinsing, cover the burn with a thin layer of antibiotic ointment. Then bandage it. A nonstick dressing is best and you may need tape to hold the dressing in place.
Close Open Cuts
If the edges of a cut are separated but will go together, use a butterfly bandage to close the wound. This type of bandage should be placed across the cut, not along its length. If the wound is long, more than one bandage may be needed. Seek professional care for cuts that are gaping, are more than 1/4 inch deep, or don’t stop bleeding after 15 minutes of pressure.
Watch Surgical Wounds for Infection
After surgery, you’ll need to keep the incision site clean and dry. Change the dressing according to your doctor’s instructions. You’ll most likely need sterile gauze pads, medical gloves, and surgical tape. Each time you remove the old dressing, check the wound for signs of infection, such as a yellow or green discharge or an unusual odor.
How to Cover Scraped Knees or Elbows
Skinned knees or elbows can also be awkward to cover. Adhesive bandages with wings can hug joints and move with you. Another alternative: Use a liquid bandage. This will stop minor bleeding and protect the wound from dirt and water. Liquid bandage is shower-resistant and only needs to be applied once.
Bandaging Knuckles, Heels, and Fingers
Fingers, heels, knuckles, and knees move, so covering them can be tricky. But you'll want to keep them covered to keep dirt out. Bandages that are hourglass shaped or notched so they are shaped like an "H" can prevent folds and bunching. Or they can wrap around a fingertip for full coverage.
Large Scrapes: Cover Them Up
Scrapes that cover a large area should be kept moist to help promote healing. Antibiotic ointment or moisture-enhancing bandages, also called occlusive bandages, can do the job. Some scrapes don’t form a scab as they heal, but remain shiny and raw. If this occurs, wash the wound with clean water and apply a fresh bandage regularly. Watch for signs of infection.
Cuts on Your Hands or Feet: Keep them Clean
The hands and feet are exposed to more dirt than the face, so it’s best to keep cuts covered. Bandaging can also prevent shoes and socks from irritating wounds on the feet. Adhesive strips can be used for small cuts, but be sure to change the bandage if it gets wet or dirty. Seek medical help for deep cuts or puncture wounds on the hands or feet. When treating wounds, use medical gloves to protect yourself from blood.
When to See a Doctor About an Injury
Call your doctor for deep cuts, puncture wounds, or injuries that don’t stop bleeding after several minutes of pressure. Adults should call a doctor about getting a tetanus shot if they haven’t had one in the past 5 years. For children, check with your doctor. And always look out for infection. Seek medical care if a wound becomes red, painful or swollen, or drains a creamy fluid, especially if you have a fever.
Source: WebMD
Scratches and Cuts on the Face
Your injury’s location can affect how you bandage it. For most injuries, first you’ll want clean it with water to get rid of debris and help prevent infection. Then, stop bleeding by applying pressure with sterile gauze. Face injuries can bleed a lot. But once bleeding stops, minor face cuts can go uncovered. Or a small adhesive strip can work well. You may need stitches if your cut is deep or longer than 3/4 inches.
Don’t Pop Blisters
Small, unbroken blisters can be left uncovered and will usually heal on their own. The exception -- if a blister is in an area where it might get rubbed, such as on the sole of the foot. In that case, protect the blister with a doughnut-shaped moleskin pad. For broken blisters, apply an antibiotic ointment and loose bandage.
Wrap Sprains and Strains
A sprain means torn ligaments or tendons, while a strain involves an overworked muscle. The signs are pain and swelling. In addition to icing the injury, wrap it with an elastic compression bandage. You want it snug but not so tight that it cuts off circulation. Keep the bandage on for two days to reduce swelling (loosening it at night). See a doctor if the pain becomes severe or doesn’t improve after five days.
How to Treat Minor Burns
Seek medical help for burns if they are severe, on the face, or bigger than 2 inches. For treating small minor burns at home, rinse the area in cool water. Never use butter, grease, or powder on a burn. After rinsing, cover the burn with a thin layer of antibiotic ointment. Then bandage it. A nonstick dressing is best and you may need tape to hold the dressing in place.
Close Open Cuts
If the edges of a cut are separated but will go together, use a butterfly bandage to close the wound. This type of bandage should be placed across the cut, not along its length. If the wound is long, more than one bandage may be needed. Seek professional care for cuts that are gaping, are more than 1/4 inch deep, or don’t stop bleeding after 15 minutes of pressure.
Watch Surgical Wounds for Infection
After surgery, you’ll need to keep the incision site clean and dry. Change the dressing according to your doctor’s instructions. You’ll most likely need sterile gauze pads, medical gloves, and surgical tape. Each time you remove the old dressing, check the wound for signs of infection, such as a yellow or green discharge or an unusual odor.
How to Cover Scraped Knees or Elbows
Skinned knees or elbows can also be awkward to cover. Adhesive bandages with wings can hug joints and move with you. Another alternative: Use a liquid bandage. This will stop minor bleeding and protect the wound from dirt and water. Liquid bandage is shower-resistant and only needs to be applied once.
Bandaging Knuckles, Heels, and Fingers
Fingers, heels, knuckles, and knees move, so covering them can be tricky. But you'll want to keep them covered to keep dirt out. Bandages that are hourglass shaped or notched so they are shaped like an "H" can prevent folds and bunching. Or they can wrap around a fingertip for full coverage.
Large Scrapes: Cover Them Up
Scrapes that cover a large area should be kept moist to help promote healing. Antibiotic ointment or moisture-enhancing bandages, also called occlusive bandages, can do the job. Some scrapes don’t form a scab as they heal, but remain shiny and raw. If this occurs, wash the wound with clean water and apply a fresh bandage regularly. Watch for signs of infection.
Cuts on Your Hands or Feet: Keep them Clean
The hands and feet are exposed to more dirt than the face, so it’s best to keep cuts covered. Bandaging can also prevent shoes and socks from irritating wounds on the feet. Adhesive strips can be used for small cuts, but be sure to change the bandage if it gets wet or dirty. Seek medical help for deep cuts or puncture wounds on the hands or feet. When treating wounds, use medical gloves to protect yourself from blood.
When to See a Doctor About an Injury
Call your doctor for deep cuts, puncture wounds, or injuries that don’t stop bleeding after several minutes of pressure. Adults should call a doctor about getting a tetanus shot if they haven’t had one in the past 5 years. For children, check with your doctor. And always look out for infection. Seek medical care if a wound becomes red, painful or swollen, or drains a creamy fluid, especially if you have a fever.
Saturday, June 18, 2011
The Worst Shoes for Your Feet
Reviewed by Louise Chang, MD on May 11, 2011
Source: WebMD
Culprit: Ultra-High Heels
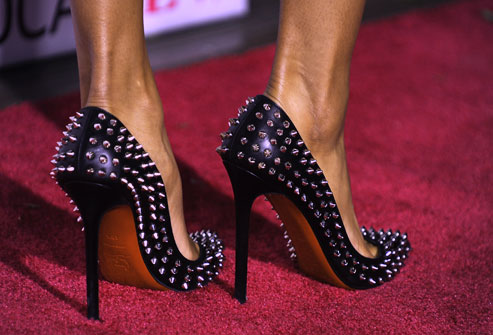
"Heels are getting higher and higher," says Hillary Brenner, DPM. "We podiatrists like to call it shoe-icide." Brenner, a spokeswoman for the American Podiatric Medical Association, says ultra-high heels can lead to everything from ankle sprains to chronic pain. Let's take a closer look at the heights, styles, and woes of today's footwear.
Problem: Pump Bump
Whether they're sky-high or mid-heel, this style is notorious for causing a painful knot on the back of the heel. The rigid material presses on a bony deformity some women have called a "pump bump." The pressure leads to blisters, swelling, bursitis, even pain in the Achilles tendon. Ice, orthotics, and heel pads may provide pain relief …along with better shoes. The bony protrusion is permanent.
Problem: Unnatural Foot Position
Ultra-high heels force the feet into a position that puts stress on the ball of the foot. At this critical joint, the long metatarsal bones meet the pea-shaped sesamoid bones, and the toe bones (phalanges). Too much pressure can inflame these bones or the nerves that surround them. Chronic stress to the foot bones can even lead to hairline fractures.
Solution: Go Low
Switching to lower heels will help you avoid problems with the metatarsal bones. The lower you go, the more natural your foot position will be. Brenner recommends choosing heels that are no more than 2 inches high -- and even those should be worn in moderation.
Problem: Ankle Sprains
All high heels boost the risk of an ankle sprain. The most common problem is a lateral sprain, which happens when you roll onto the outside of your foot. This stretches the ankle ligaments beyond their normal length. A severe sprain may tear the ligaments. A sprained ankle should be immobilized and may need physical therapy to heal properly. The risk of developing osteoarthritis rises with a severe sprain or fracture of the ankle.
Culprit: Stilettos
Although all high heels can cause problems, the ultra narrow heels of stilettos are particularly risky. "The weight is pinpointed on one area," Brenner tells WebMD. "That makes you wobble like you're walking on stilts." The result is that you're more likely to trip and sprain your ankle.
Solution: Chunky Heels
A chunky heel has more surface area and distributes your weight more evenly. This makes the feet much more stable when compared to stilettos or spindle heels. Although thick high heels can still put stress on the ball of your foot, they may reduce the tripping hazard by minimizing your wobble.
Culprit: Ballet Flats
Brenner compares these dainty shoes to walking on cardboard. "There's no arch support whatsoever," she tells WebMD. That keeps the feet from functioning optimally and can lead to knee, hip, and back problems. Poor arch support is also associated with a painful foot condition called plantar fasciitis.
Solution: Orthotic Inserts
If you love the look of ballet flats, over-the-counter inserts (shown here) may help prevent mild foot pain. Heel pads can provide extra cushioning for achy heels. And custom orthotics can ease a whole range of foot pains and problems. Podiatrists prescribe these inserts to provide arch support and reduce pressure on sensitive areas. Prescription orthotics can be pricey, but are sometimes covered by insurance.
Culprit: Flip-Flops
Flip-flops offer very little protection. The risk of getting splinters or other foot injuries is higher when the feet are so exposed. People with diabetes should not wear flip-flops, because simple cuts and scrapes can lead to serious complications. In addition, many flip-flops provide no arch support. Like ballet flats, they can aggravate plantar fasciitis and cause problems with the knees, hips, or back.
Problem: Plantar Fasciitis
A band of tissue called the plantar fascia runs along the bottom of the foot. It pulls on the heel when you walk -- and it works best with the proper arch in your foot. Walking barefoot, or in flimsy shoes without sufficient arch support, can overstretch, tear, or inflame the plantar fascia. This common condition can cause intense heel pain, and resting the feet only provides temporary relief.
Better: 'Fitted' Flops
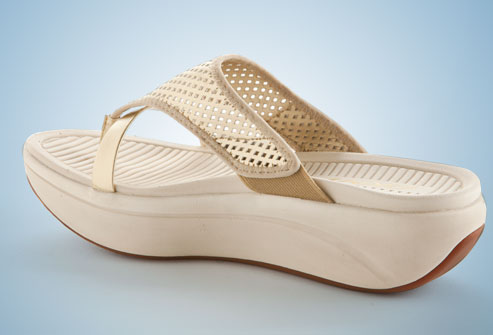
Sporty, fitted sandals and other "toning shoes" are designed for a more intense workout while walking. The American Council on Exercise says there's no evidence to support that claim, but they may have other benefits. The thick sole keeps your foot off the ground and away from debris. And Brenner points out, "they do have really good arch support." Several have a seal of approval from the American Podiatric Medical Association.
Culprit: Platform Shoes
Platform shoes and wedges tend to have rigid foot beds. "That throws off the biomechanics of walking," Brenner says. "Your foot is trying to bend a certain way, but the shoe is fighting you because it's so rigid." If the heel of the platform is much higher than the toe area, the shoe also puts pressure on the metatarsal bones.
Better: Flatter Platforms
Although still not recommended, a flatter platform shoe may put less strain on your feet than its peers. Look for a wide wedge or platform that is nearly parallel with the ground. This will lessen the pressure on the ball of the foot. However, the rigid sole remains a barrier to the natural walking motion.
Culprit: Pointy Toes
They might be stylish, but shoes with pointy toes squeeze the entire front of your foot together. After time, this can cause nerve pain, bunions, blisters, and hammertoes. Some women even develop bruises under their toenails from the constant pressure.
Problem: Bunions
A bunion is a painful lump at the base of the big toe, which may cause the toe to bend unnaturally. It forms when the tissue or bone at the base joint gets displaced. This may happen after years of abnormal pressure and movement. Pointy-toed shoes are a common factor, which explains the prevalence of bunions among women.
Problem: Toe Deformities
High heeled shoes push too much body weight toward the toes and then squeeze them together. Over time, the result can be hammertoe (early stage, lower right), abnormal bends in the toe joints that can gradually become rigid. Surgery is sometimes needed to relieve the pain of severe hammertoe. Crowding can cause other toe deformities, along with continuous shoe friction, leading to painful corns and calluses.
Solution: Wide Toe Box
You can avoid the pointy toe perils by selecting boxier shoes. If that style doesn't appeal to you, look for shoes that slope to a point beyond the edge of your toes. A healthy style won't pinch the tips or sides of your toes. Brenner also suggests choosing a softer material, rather than stiff leather.
Culprit: Celebrity Trendsetters
Lady Gaga is known for her eccentric style, but you may want to think twice before stepping into the heel-less shoes she favors. The 12-inch mega-heels seen in her "Bad Romance" video are equally risky. As we've seen, putting so much stress on the ball of your foot can cause bone and nerve damage and pain.
Solution: Performance Pumps
Many women are unwilling to trade style for comfort, but you may not have to choose between the two. Performance pumps offer a sound compromise, taking both fashion and your health into consideration. They are typically made with reinforced heels, athletic shoe construction, and more wiggle room for your toes.
Culprit: Wrong Size Shoes
Nine out of 10 women are wearing shoes that are too small. The consequences aren't pretty – calluses, blisters, bunions, corns, and other problems. The constant rubbing can irritate the joints in the foot and lead to arthritis. Research suggests many kids are also wearing the wrong shoe size, which puts them at risk for foot deformities as they grow.
Solution: Measure Your Feet
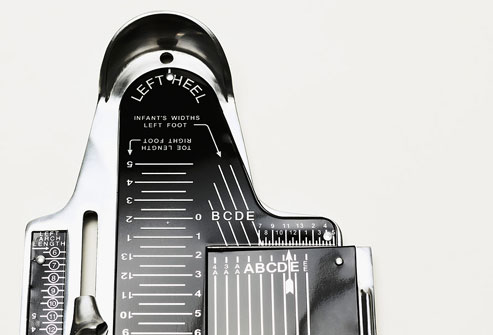
Before buying new shoes, have a professional measure the length and width of your feet at the end of the day, while you're standing. For unusually flat feet or high arches, an exam by a podiatrist may be warranted. These conditions can increase the risk of osteoarthritis. Early treatment and use of proper footwear may help to avoid unnecessary wear and tear on the joints of the foot.
Men's Trends
Pointy-toed shoes have crossed the gender line. This footwear fad carries the same risk in men as in women – including hammertoes, bunions, and pain. To avoid these problems, stick with a boxier toe. At the office, a classic pair of oxfords or loafers may not turn heads, but your feet will thank you.
Fitness Trends: Minimalist Shoe
Newer additions to the shoe scene are minimalist shoes. They aim to mimic the natural feel and mechanics of walking barefoot. Brenner is not impressed. "There's no support for your heel or arch and no shock absorption," she says. In addition, in some brands, the "fingers" separate the toes, interfering with the natural walking position.
Fitness Trends: Rocker Bottoms
Rocker bottom shoes facilitate the push-off motion as you walk. This style can help with joint pain, according to Brenner. It's also good for people with mild foot deformities. However, she does not recommend the shoe for older people or people with medical conditions that affect balance or muscle strength.
3 Tips for Better Shoes
If you're ready to do right by your feet, Brenner offers these three tips:
*Make sure the shoe bends at the toe box, but is not too flexible.
*Make sure there is a sufficient arch support.
*Choose a chunky heel that is less than 2 inches high.
Source: WebMD
Culprit: Ultra-High Heels
"Heels are getting higher and higher," says Hillary Brenner, DPM. "We podiatrists like to call it shoe-icide." Brenner, a spokeswoman for the American Podiatric Medical Association, says ultra-high heels can lead to everything from ankle sprains to chronic pain. Let's take a closer look at the heights, styles, and woes of today's footwear.
Problem: Pump Bump
Whether they're sky-high or mid-heel, this style is notorious for causing a painful knot on the back of the heel. The rigid material presses on a bony deformity some women have called a "pump bump." The pressure leads to blisters, swelling, bursitis, even pain in the Achilles tendon. Ice, orthotics, and heel pads may provide pain relief …along with better shoes. The bony protrusion is permanent.
Problem: Unnatural Foot Position
Ultra-high heels force the feet into a position that puts stress on the ball of the foot. At this critical joint, the long metatarsal bones meet the pea-shaped sesamoid bones, and the toe bones (phalanges). Too much pressure can inflame these bones or the nerves that surround them. Chronic stress to the foot bones can even lead to hairline fractures.
Solution: Go Low
Switching to lower heels will help you avoid problems with the metatarsal bones. The lower you go, the more natural your foot position will be. Brenner recommends choosing heels that are no more than 2 inches high -- and even those should be worn in moderation.
Problem: Ankle Sprains
All high heels boost the risk of an ankle sprain. The most common problem is a lateral sprain, which happens when you roll onto the outside of your foot. This stretches the ankle ligaments beyond their normal length. A severe sprain may tear the ligaments. A sprained ankle should be immobilized and may need physical therapy to heal properly. The risk of developing osteoarthritis rises with a severe sprain or fracture of the ankle.
Culprit: Stilettos
Although all high heels can cause problems, the ultra narrow heels of stilettos are particularly risky. "The weight is pinpointed on one area," Brenner tells WebMD. "That makes you wobble like you're walking on stilts." The result is that you're more likely to trip and sprain your ankle.
Solution: Chunky Heels
A chunky heel has more surface area and distributes your weight more evenly. This makes the feet much more stable when compared to stilettos or spindle heels. Although thick high heels can still put stress on the ball of your foot, they may reduce the tripping hazard by minimizing your wobble.
Culprit: Ballet Flats
Brenner compares these dainty shoes to walking on cardboard. "There's no arch support whatsoever," she tells WebMD. That keeps the feet from functioning optimally and can lead to knee, hip, and back problems. Poor arch support is also associated with a painful foot condition called plantar fasciitis.
Solution: Orthotic Inserts
If you love the look of ballet flats, over-the-counter inserts (shown here) may help prevent mild foot pain. Heel pads can provide extra cushioning for achy heels. And custom orthotics can ease a whole range of foot pains and problems. Podiatrists prescribe these inserts to provide arch support and reduce pressure on sensitive areas. Prescription orthotics can be pricey, but are sometimes covered by insurance.
Culprit: Flip-Flops
Flip-flops offer very little protection. The risk of getting splinters or other foot injuries is higher when the feet are so exposed. People with diabetes should not wear flip-flops, because simple cuts and scrapes can lead to serious complications. In addition, many flip-flops provide no arch support. Like ballet flats, they can aggravate plantar fasciitis and cause problems with the knees, hips, or back.
Problem: Plantar Fasciitis
A band of tissue called the plantar fascia runs along the bottom of the foot. It pulls on the heel when you walk -- and it works best with the proper arch in your foot. Walking barefoot, or in flimsy shoes without sufficient arch support, can overstretch, tear, or inflame the plantar fascia. This common condition can cause intense heel pain, and resting the feet only provides temporary relief.
Better: 'Fitted' Flops
Sporty, fitted sandals and other "toning shoes" are designed for a more intense workout while walking. The American Council on Exercise says there's no evidence to support that claim, but they may have other benefits. The thick sole keeps your foot off the ground and away from debris. And Brenner points out, "they do have really good arch support." Several have a seal of approval from the American Podiatric Medical Association.
Culprit: Platform Shoes
Platform shoes and wedges tend to have rigid foot beds. "That throws off the biomechanics of walking," Brenner says. "Your foot is trying to bend a certain way, but the shoe is fighting you because it's so rigid." If the heel of the platform is much higher than the toe area, the shoe also puts pressure on the metatarsal bones.
Better: Flatter Platforms
Although still not recommended, a flatter platform shoe may put less strain on your feet than its peers. Look for a wide wedge or platform that is nearly parallel with the ground. This will lessen the pressure on the ball of the foot. However, the rigid sole remains a barrier to the natural walking motion.
Culprit: Pointy Toes
They might be stylish, but shoes with pointy toes squeeze the entire front of your foot together. After time, this can cause nerve pain, bunions, blisters, and hammertoes. Some women even develop bruises under their toenails from the constant pressure.
Problem: Bunions
A bunion is a painful lump at the base of the big toe, which may cause the toe to bend unnaturally. It forms when the tissue or bone at the base joint gets displaced. This may happen after years of abnormal pressure and movement. Pointy-toed shoes are a common factor, which explains the prevalence of bunions among women.
Problem: Toe Deformities
High heeled shoes push too much body weight toward the toes and then squeeze them together. Over time, the result can be hammertoe (early stage, lower right), abnormal bends in the toe joints that can gradually become rigid. Surgery is sometimes needed to relieve the pain of severe hammertoe. Crowding can cause other toe deformities, along with continuous shoe friction, leading to painful corns and calluses.
Solution: Wide Toe Box
You can avoid the pointy toe perils by selecting boxier shoes. If that style doesn't appeal to you, look for shoes that slope to a point beyond the edge of your toes. A healthy style won't pinch the tips or sides of your toes. Brenner also suggests choosing a softer material, rather than stiff leather.
Culprit: Celebrity Trendsetters
Lady Gaga is known for her eccentric style, but you may want to think twice before stepping into the heel-less shoes she favors. The 12-inch mega-heels seen in her "Bad Romance" video are equally risky. As we've seen, putting so much stress on the ball of your foot can cause bone and nerve damage and pain.
Solution: Performance Pumps
Many women are unwilling to trade style for comfort, but you may not have to choose between the two. Performance pumps offer a sound compromise, taking both fashion and your health into consideration. They are typically made with reinforced heels, athletic shoe construction, and more wiggle room for your toes.
Culprit: Wrong Size Shoes
Nine out of 10 women are wearing shoes that are too small. The consequences aren't pretty – calluses, blisters, bunions, corns, and other problems. The constant rubbing can irritate the joints in the foot and lead to arthritis. Research suggests many kids are also wearing the wrong shoe size, which puts them at risk for foot deformities as they grow.
Solution: Measure Your Feet
Before buying new shoes, have a professional measure the length and width of your feet at the end of the day, while you're standing. For unusually flat feet or high arches, an exam by a podiatrist may be warranted. These conditions can increase the risk of osteoarthritis. Early treatment and use of proper footwear may help to avoid unnecessary wear and tear on the joints of the foot.
Men's Trends
Pointy-toed shoes have crossed the gender line. This footwear fad carries the same risk in men as in women – including hammertoes, bunions, and pain. To avoid these problems, stick with a boxier toe. At the office, a classic pair of oxfords or loafers may not turn heads, but your feet will thank you.
Fitness Trends: Minimalist Shoe
Newer additions to the shoe scene are minimalist shoes. They aim to mimic the natural feel and mechanics of walking barefoot. Brenner is not impressed. "There's no support for your heel or arch and no shock absorption," she says. In addition, in some brands, the "fingers" separate the toes, interfering with the natural walking position.
Fitness Trends: Rocker Bottoms
Rocker bottom shoes facilitate the push-off motion as you walk. This style can help with joint pain, according to Brenner. It's also good for people with mild foot deformities. However, she does not recommend the shoe for older people or people with medical conditions that affect balance or muscle strength.
3 Tips for Better Shoes
If you're ready to do right by your feet, Brenner offers these three tips:
*Make sure the shoe bends at the toe box, but is not too flexible.
*Make sure there is a sufficient arch support.
*Choose a chunky heel that is less than 2 inches high.
Friday, June 17, 2011
How to Build a Better Butt
Reviewed by Louise Chang, MD on June 22, 2010
Source: WebMD
Booty Boot Camp
If you feel your "rear view" needs a makeover, the right fitness routine can provide a natural lift. Can you achieve the "perfect" Brazilian beach butt seen on TV? That depends partly on your body type and genetics, but most everyone can shape up to look better in jeans. Ready to take a crack at it? The following pictures show you the moves.
Behind It All: The Gluteal Muscles
The shape of the buttocks is defined by muscles known as the gluteus maximus, gluteus medius, and gluteus minimus (hidden under other muscles), as well as the overlying fat. Walking, running, and climbing all work the glutes. Strength training that targets these muscles can help develop a tighter, more rounded look. Adding a few butt-busting moves to your routine may be enough to see a difference.
Squat and Tone
The squat tops every list of butt-busting exercises. It directly engages the glutes, and you can build bigger musculature by adding weights. The key is to maintain proper alignment.
Form: Keep feet parallel, shoulder-width apart. Slowly lower hips as if sitting in an invisible chair; then return to standing. Make sure your knees do not push out in front of your toes. Keep your torso tight and back straight.
Variation: Ball Squat
If you're just starting out, a stability ball can help with balance while you master the form. For each exercise on our list, aim for three sets of 15 repetitions. That's a good start for beginners, says master trainer Dori Ricci, NASM, CPT. Try to do each exercise three times a week.
Form: Keep the ball between your low back and a wall. Slowly perform the classic squat. Walk your feet out in front so the knees stay behind your toes.
Forward Lunge
This butt builder also tones the thighs and calves, and it's a pretty good calorie burner, too.
Form: Feet parallel, hip-distance apart, take one giant step forward. Lower your body slowly, bending both knees, and return to standing. Repeat on the other side. Bend your knees no farther than 90 degrees, front knee stacked directly over your front ankle. Do not rest your back knee on the ground.
Variation: Backward Lunge
When you step backward into a lunge, it works the glutes a little more intensely and adds variety to your workout. Lunges also help promote hip flexibility and proper alignment, which can suffer when people spend long hours sitting at a desk.
Form: Use the same posture as in a forward lunge, but step backward to position the lower leg. Remember not to let the front knee push out in front of your toes.
Variation: Side Lunge
The side lunge directly targets the muscle on the outside of the hips, the glutes, and tones the inner thighs, too.
Form: From a wide stance, bend one knee. Keep the shinbone under that knee vertical to the floor. If the knee falls inside the foot, use a shorter stance. Lean forward slightly, but keep your shoulders behind your knees to avoid injury. Choose a hand position that helps with balance.
On the Ball: Leg Lift
Leg lifts done while balancing on an exercise ball will strengthen your shoulders and abs, in addition to your glutes. As you get more fit, try lifting both legs simultaneously for a more challenging, butt-sculpting move.
Form: Keep your abs tight and back flat. Squeeze the gluteal muscles tight as you lift one leg. Just a few inches is fine, especially for beginners. Be careful not to engage the muscles of the low back.
On the Ball: Hip Lift
This small movement isolates and works the gluteus maximus, the largest muscle in the body. Be careful not to use the back muscles; the glutes should do the work.
Form: Bend the knees 90 degrees, feet together. Squeeze the glutes and slowly move the thighs up off the ball. A small, controlled, 2-inch movement is the goal.
Floor Work: Bridge
This classic is a surprisingly good workout for the glutes, as well as the hamstrings and hips.
Form: Begin on your back with your knees bent, feet hip-width apart. Slowly peel your spine off the floor from the tailbone, one vertebra at a time, tightening the glutes and hamstrings. Pause when you create a diagonal line from shoulders to knees. Lower slowly, one vertebra at a time.
Floor Work: Side Leg Raises
This move targets the two smaller muscle groups in the buttocks, the gluteus medius and minimus. Raising the leg just a few inches will work these muscles.
Form: Lift the top leg while lying on your side. Keep the hips stacked and the torso still; both knees facing forward. For a variation that works slightly different muscles, you can turn the top leg out from the hip.
Floor Work: Dirty Dog
This butt-building move gained fame in the exercise videos of the 1970s as the "fire hydrant." It targets two of the muscles groups in the buttocks.
Form: Keep your knees hip-width apart and your hands directly under your shoulders, elbows straight. Gently stiffen the abs and keep your back in a neutral position with no sagging or arching. Slowly draw one knee up. Rotate the hip to bring the leg toward the torso, then away.
Floor Work: Running Plank
In addition to challenging the gluteal muscles, running plank works the shoulders, hips, and core muscles. Do it quickly to burn calories while building muscle.
Form: Engage the abdominal muscles to protect the lower back. Spread your fingers wide to protect the wrists.
Walk the Hills
Walking is a natural, anywhere, no-fuss butt workout. Tackle the hills for maximum gluteal impact — and to burn a few more calories when you're trying to lose excess body fat. On a treadmill, use a 5% to 7% incline to increase the workout.
Tone Your Tush With Cardio
In the gym, stair steppers, arc trainers, and elliptical machines are good choices to challenge the glutes while giving your heart and lungs a healthy workout. Inline skating and cycling are other heart-pumping options that tone the tush.
Firm Up Without Bulking Up
Some people's muscles rise to a challenge by bulking up. If that's your genetic destiny — and you don't like a pumped up look — focus on aerobic activity over weight training. Don't crank the resistance up too high on an exercise machine. And skip the weights when you do butt-sculpting exercises.
Slim Your Assets
Targeted exercises alone are not likely to produce a smaller behind, just a firmer one. For a more dramatic change: watch your diet, burn more calories, and lose weight. That strategy can reduce the fat pad lying over the gluteal muscles, resulting in a tush that's trimmer and tighter.
Go for Gluteus Maximus
If bigger is better, you'll want to really challenge the gluteal muscles. Dial up the resistance on a stationary bike or other cardio machine. During strength training, go for more weight, more repetitions, and shorter rest periods between exercises. A high-quality diet is also important in building muscle mass.
Can You Shift Your Shape?
There's much talk in beauty magazines about a rounded, "Brazilian-style" butt. Targeted exercises can move a flat behind a little closer to this beauty ideal. But a workout will most likely enhance the shape you have: heart-shaped, pear, bubble, or another. For a dramatic reshaping, after a huge weight loss, for instance, cosmetic surgeons offer implants, lifts, and reshaping.
Shapewear for Your Tush
A multitude of undergarments are available now to "separate and lift" your bottom, rein it in with elastic panels, or enhance your rear view with padding. Padded inserts and lifting Spandex panels are available in jeans, too.
Dress Your Assets Down
Complement your workout with the right clothing style. Boot-cut and flared jeans balance out the hips and rear for a slimming effect. Long pant legs create the illusion of longer legs and a smaller booty. And back pockets can create amazing illusions. Just beware of super-long back pockets that can make your behind look flat or saggy, instead of showing off the great contours you earned at the gym.
Dress Your Assets Up
Skip the peg leg and ankle jeans, popularized in the '80s, which accentuate the hips and make your body look like an ice cream cone with a big, round scoop on top. A better choice to really show off your curves are super-tight pant legs or leggings, along with a tight form-fitting rear panel for that head-turning, Brazilian "butt-lift" style.
Source: WebMD
Booty Boot Camp
If you feel your "rear view" needs a makeover, the right fitness routine can provide a natural lift. Can you achieve the "perfect" Brazilian beach butt seen on TV? That depends partly on your body type and genetics, but most everyone can shape up to look better in jeans. Ready to take a crack at it? The following pictures show you the moves.
Behind It All: The Gluteal Muscles
The shape of the buttocks is defined by muscles known as the gluteus maximus, gluteus medius, and gluteus minimus (hidden under other muscles), as well as the overlying fat. Walking, running, and climbing all work the glutes. Strength training that targets these muscles can help develop a tighter, more rounded look. Adding a few butt-busting moves to your routine may be enough to see a difference.
Squat and Tone
The squat tops every list of butt-busting exercises. It directly engages the glutes, and you can build bigger musculature by adding weights. The key is to maintain proper alignment.
Form: Keep feet parallel, shoulder-width apart. Slowly lower hips as if sitting in an invisible chair; then return to standing. Make sure your knees do not push out in front of your toes. Keep your torso tight and back straight.
Variation: Ball Squat
If you're just starting out, a stability ball can help with balance while you master the form. For each exercise on our list, aim for three sets of 15 repetitions. That's a good start for beginners, says master trainer Dori Ricci, NASM, CPT. Try to do each exercise three times a week.
Form: Keep the ball between your low back and a wall. Slowly perform the classic squat. Walk your feet out in front so the knees stay behind your toes.
Forward Lunge
This butt builder also tones the thighs and calves, and it's a pretty good calorie burner, too.
Form: Feet parallel, hip-distance apart, take one giant step forward. Lower your body slowly, bending both knees, and return to standing. Repeat on the other side. Bend your knees no farther than 90 degrees, front knee stacked directly over your front ankle. Do not rest your back knee on the ground.
Variation: Backward Lunge
When you step backward into a lunge, it works the glutes a little more intensely and adds variety to your workout. Lunges also help promote hip flexibility and proper alignment, which can suffer when people spend long hours sitting at a desk.
Form: Use the same posture as in a forward lunge, but step backward to position the lower leg. Remember not to let the front knee push out in front of your toes.
Variation: Side Lunge
The side lunge directly targets the muscle on the outside of the hips, the glutes, and tones the inner thighs, too.
Form: From a wide stance, bend one knee. Keep the shinbone under that knee vertical to the floor. If the knee falls inside the foot, use a shorter stance. Lean forward slightly, but keep your shoulders behind your knees to avoid injury. Choose a hand position that helps with balance.
On the Ball: Leg Lift
Leg lifts done while balancing on an exercise ball will strengthen your shoulders and abs, in addition to your glutes. As you get more fit, try lifting both legs simultaneously for a more challenging, butt-sculpting move.
Form: Keep your abs tight and back flat. Squeeze the gluteal muscles tight as you lift one leg. Just a few inches is fine, especially for beginners. Be careful not to engage the muscles of the low back.
On the Ball: Hip Lift
This small movement isolates and works the gluteus maximus, the largest muscle in the body. Be careful not to use the back muscles; the glutes should do the work.
Form: Bend the knees 90 degrees, feet together. Squeeze the glutes and slowly move the thighs up off the ball. A small, controlled, 2-inch movement is the goal.
Floor Work: Bridge
This classic is a surprisingly good workout for the glutes, as well as the hamstrings and hips.
Form: Begin on your back with your knees bent, feet hip-width apart. Slowly peel your spine off the floor from the tailbone, one vertebra at a time, tightening the glutes and hamstrings. Pause when you create a diagonal line from shoulders to knees. Lower slowly, one vertebra at a time.
Floor Work: Side Leg Raises
This move targets the two smaller muscle groups in the buttocks, the gluteus medius and minimus. Raising the leg just a few inches will work these muscles.
Form: Lift the top leg while lying on your side. Keep the hips stacked and the torso still; both knees facing forward. For a variation that works slightly different muscles, you can turn the top leg out from the hip.
Floor Work: Dirty Dog
This butt-building move gained fame in the exercise videos of the 1970s as the "fire hydrant." It targets two of the muscles groups in the buttocks.
Form: Keep your knees hip-width apart and your hands directly under your shoulders, elbows straight. Gently stiffen the abs and keep your back in a neutral position with no sagging or arching. Slowly draw one knee up. Rotate the hip to bring the leg toward the torso, then away.
Floor Work: Running Plank
In addition to challenging the gluteal muscles, running plank works the shoulders, hips, and core muscles. Do it quickly to burn calories while building muscle.
Form: Engage the abdominal muscles to protect the lower back. Spread your fingers wide to protect the wrists.
Walk the Hills
Walking is a natural, anywhere, no-fuss butt workout. Tackle the hills for maximum gluteal impact — and to burn a few more calories when you're trying to lose excess body fat. On a treadmill, use a 5% to 7% incline to increase the workout.
Tone Your Tush With Cardio
In the gym, stair steppers, arc trainers, and elliptical machines are good choices to challenge the glutes while giving your heart and lungs a healthy workout. Inline skating and cycling are other heart-pumping options that tone the tush.
Firm Up Without Bulking Up
Some people's muscles rise to a challenge by bulking up. If that's your genetic destiny — and you don't like a pumped up look — focus on aerobic activity over weight training. Don't crank the resistance up too high on an exercise machine. And skip the weights when you do butt-sculpting exercises.
Slim Your Assets
Targeted exercises alone are not likely to produce a smaller behind, just a firmer one. For a more dramatic change: watch your diet, burn more calories, and lose weight. That strategy can reduce the fat pad lying over the gluteal muscles, resulting in a tush that's trimmer and tighter.
Go for Gluteus Maximus
If bigger is better, you'll want to really challenge the gluteal muscles. Dial up the resistance on a stationary bike or other cardio machine. During strength training, go for more weight, more repetitions, and shorter rest periods between exercises. A high-quality diet is also important in building muscle mass.
Can You Shift Your Shape?
There's much talk in beauty magazines about a rounded, "Brazilian-style" butt. Targeted exercises can move a flat behind a little closer to this beauty ideal. But a workout will most likely enhance the shape you have: heart-shaped, pear, bubble, or another. For a dramatic reshaping, after a huge weight loss, for instance, cosmetic surgeons offer implants, lifts, and reshaping.
Shapewear for Your Tush
A multitude of undergarments are available now to "separate and lift" your bottom, rein it in with elastic panels, or enhance your rear view with padding. Padded inserts and lifting Spandex panels are available in jeans, too.
Dress Your Assets Down
Complement your workout with the right clothing style. Boot-cut and flared jeans balance out the hips and rear for a slimming effect. Long pant legs create the illusion of longer legs and a smaller booty. And back pockets can create amazing illusions. Just beware of super-long back pockets that can make your behind look flat or saggy, instead of showing off the great contours you earned at the gym.
Dress Your Assets Up
Skip the peg leg and ankle jeans, popularized in the '80s, which accentuate the hips and make your body look like an ice cream cone with a big, round scoop on top. A better choice to really show off your curves are super-tight pant legs or leggings, along with a tight form-fitting rear panel for that head-turning, Brazilian "butt-lift" style.
Subscribe to:
Posts (Atom)